


How to Convert RV Batteries to Lithium (Step-by-Step Upgrade Guide)
Upgrading your electrical system is the fastest way to improve off-grid comfort and reduce generator use. If you are searching how to convert RV to lithium battery, the key is upgrading not only the battery, but also the charging equipment that supports it. A properly installed RV lithium battery system delivers more usable capacity, faster charging, and longer lifespan than any traditional lead-acid battery setup.
Most RV owners convert to lithium because lead-acid batteries waste capacity and lose voltage quickly under load. Lithium batteries solve those problems by delivering steady power and deeper usable energy.
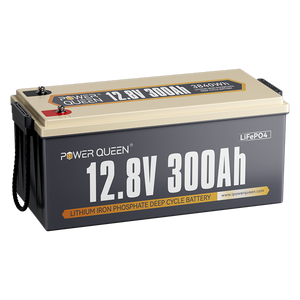
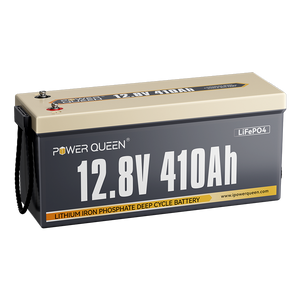
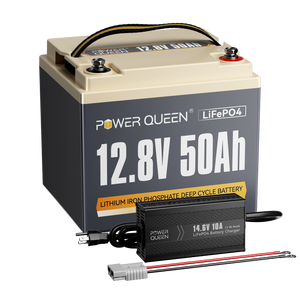
If you want a high-capacity solution for extended boondocking and heavy inverter loads, the Power Queen 12V 300Ah LiFePO₄ battery is a strong option built for serious RV power upgrades.
Why Converting an RV to Lithium Battery Is Worth It
Switching to lithium is worth it because lithium batteries provide more usable energy and a much longer service life than lead-acid batteries. A lead-acid battery is typically only discharged to about 50% to avoid damage, while lithium batteries can safely discharge much deeper without shortening lifespan.
Lithium also charges faster, which matters for RV owners relying on solar panels, shore power, or limited generator run time. Instead of spending hours recharging, you can often recover most of your battery capacity in a shorter window.
The long-term value is also significant. Even though lithium costs more upfront, it usually lasts several times longer than lead-acid, which reduces replacement cost over time.
If you want to compare different sizes and setups designed specifically for RV use, you can browse the RV lithium battery collection to find the best fit for your rig.
Looking for more expert advice?
Read our Best Battery for RV Living (2026 Buyer’s Guide) to find the ultimate power solution for your off-grid adventures.

RV Lithium Battery vs Lead-Acid Battery (What Changes in Real Life)
Lithium batteries outperform lead-acid batteries in nearly every category that affects RV travel. The most noticeable difference is that lithium provides consistent voltage, so appliances and inverters run smoother and longer.
RV Lithium Battery vs Lead-Acid Battery Comparison Table
| Feature | RV Lithium Battery (LiFePO4) | Lead-Acid Battery |
|---|---|---|
| Usable capacity | 80% to 100% | About 50% recommended |
| Weight | Lightweight | Heavy |
| Charging speed | Fast | Slow |
| Voltage stability | Very stable | Drops steadily |
| Maintenance | No watering, low maintenance | Flooded types require upkeep |
| Lifespan | Often 8 to 15 years | Often 2 to 5 years |
| Best for | Boondocking, solar, inverter use | Short trips, light usage |
This difference is why serious boondockers and full-time RVers increasingly choose lithium over lead-acid battery systems.
For a deeper explanation of why lithium is considered the best deep-cycle upgrade, see Deep Cycle Redefined: Why Lithium is the Modern Alternative to Lead Acid.
If you are still comparing options, this guide on AGM vs Lithium RV Batteries breaks down the pros and cons clearly.
What You Need Before You Convert RV to Lithium Battery
You need the right charging components because lithium batteries require a different charging profile than lead-acid batteries. Many RV owners make the mistake of installing lithium first and discovering later that their converter or solar controller cannot charge it correctly.
A successful conversion depends on making sure every charging source in your RV supports lithium.
RV Lithium Conversion Equipment Checklist
- RV lithium battery (LiFePO4 recommended)
- Battery Management System (BMS) built into the battery
- Lithium-compatible converter charger
- Lithium-capable solar charge controller (if solar is installed)
- Proper fuse or circuit breaker near the battery
- Correct cable size for your current draw
- Battery monitor (highly recommended)
- DC to DC charger (recommended if alternator charging)
Each of these parts affects charging speed, safety, and battery lifespan.
Step-by-Step Process to Convert RV Batteries to Lithium
Converting an RV to lithium is not just about swapping out a battery. A proper lithium upgrade requires evaluating your charging system, wiring protection, and overall energy usage. The following step-by-step process walks you through each stage of the conversion so your RV lithium battery system operates safely and efficiently.
Step 1 Calculate How Much Lithium Battery Capacity You Need
Sizing your battery bank correctly is essential because lithium upgrades are expensive and should match your real power use. If you undersize your battery bank, you will still rely heavily on a generator or shore power.
A simple way to size your system is to estimate daily amp-hour usage from your appliances.
Typical Daily RV Energy Use Table
| RV Load | Typical Use | Approximate Daily Consumption |
|---|---|---|
| LED lights | 4 to 6 hours | 10 to 20Ah |
| Water pump | 10 to 20 minutes | 3 to 6Ah |
| Furnace fan | 2 to 5 hours | 20 to 50Ah |
| RV fridge (12V compressor) | 24 hours | 40 to 90Ah |
| Laptop and phone charging | 2 to 4 hours | 10 to 25Ah |
| Microwave on inverter | 10 minutes | 15 to 30Ah |
If your daily total is around 120Ah and you want two full days off-grid, a 250Ah to 300Ah lithium battery bank is a practical target.
Lithium is more efficient than lead-acid because you can safely use most of the rated capacity.
For many RVers, a single high-capacity option like the Power Queen 12V 300Ah LiFePO₄ battery offers an excellent balance of runtime and simplicity for solar and boondocking setups.


If you also need to confirm physical battery fitment, this RV Battery Size Chart Guide (Group 24 vs 27 vs 31) can help you choose the correct size.
Step 2 Disconnect Power and Remove the Lead-Acid Battery Safely
Removing a lead-acid battery must be done safely because accidental shorts can damage wiring or cause sparks. Before touching battery cables, disconnect shore power, turn off the generator, and shut down solar charging if possible.
The correct disconnection order prevents grounding problems.
Safe Battery Removal Steps
- Turn off the RV battery disconnect switch
- Disconnect the negative cable first
- Disconnect the positive cable second
- Remove the battery and clean corrosion from the tray
- Inspect cables and terminals for wear
This step is also a good time to check your battery compartment, because lead-acid batteries often leave corrosion that can weaken connections.
If you want a complete step-by-step walkthrough of the replacement process, this Ultimate Guide to Replace RV Battery covers the full replacement process in detail.
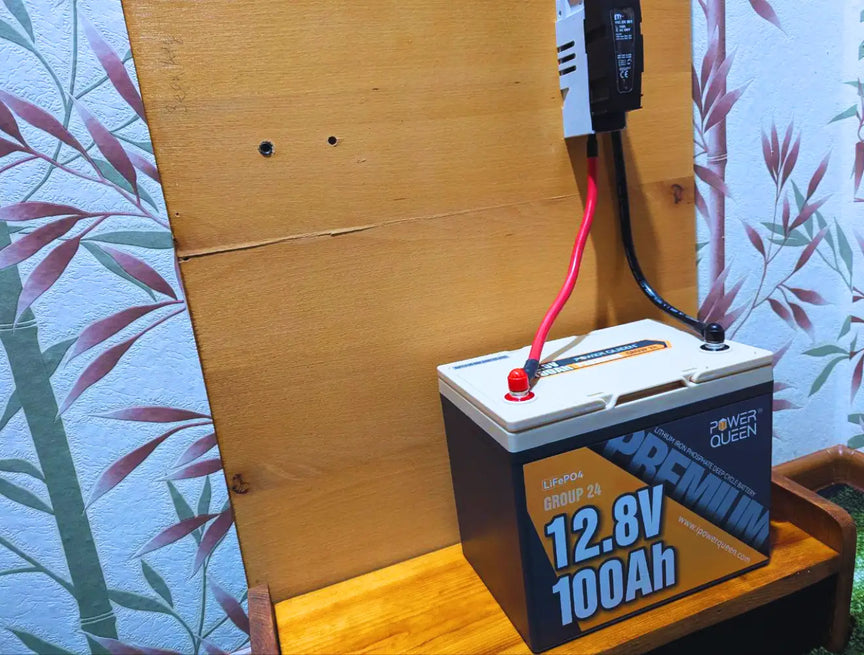
Step 3 Install the RV Lithium Battery Correctly
Installing a lithium battery is straightforward as long as the battery is secured and connections are tight. Most RV lithium battery systems can be installed in storage bays, battery trays, or inside the RV depending on space and temperature needs.
A secure installation matters because RV vibration and movement can loosen connections over time.
Lithium Battery Installation Best Practices
- Strap or mount the battery securely
- Keep it away from direct exhaust or heat sources
- Connect the positive terminal first
- Connect the negative terminal last
- Torque terminals according to manufacturer specs
Loose terminals create resistance, heat, and voltage loss, which can reduce performance and cause failure.
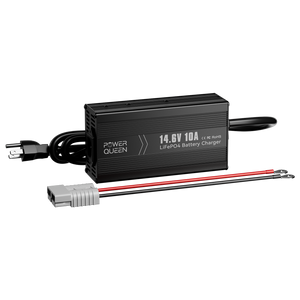
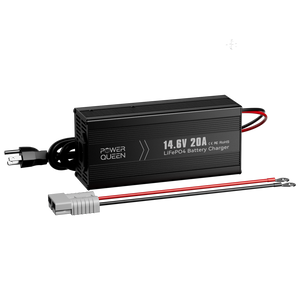
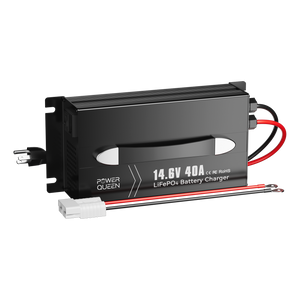
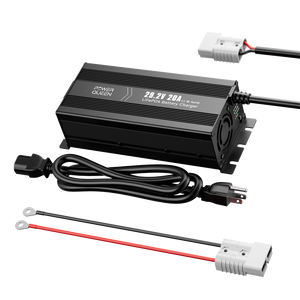
Step 4 Upgrade Your Converter Charger for Lithium
Your RV converter must be lithium-compatible because most lead-acid converters will not charge lithium properly. A lead-acid converter often stays in a float stage designed for lead-acid battery chemistry, which may prevent lithium batteries from reaching full capacity.
Lithium batteries typically need an absorption voltage around 14.2V to 14.6V depending on the manufacturer. Unlike lead-acid, lithium does not need long-term float charging to stay healthy.
If your RV is older than 8 to 10 years, upgrading the converter is usually one of the most important steps in the conversion.

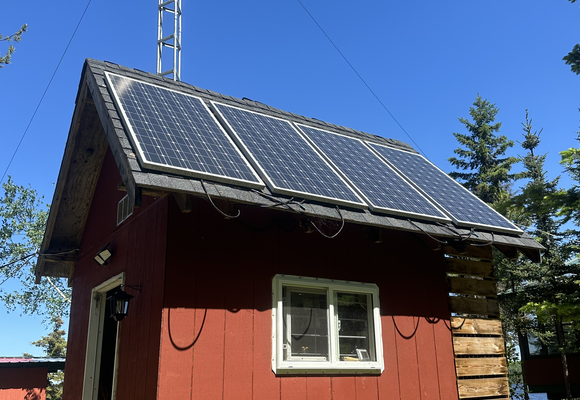
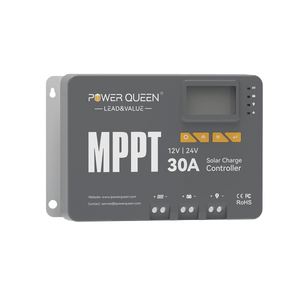
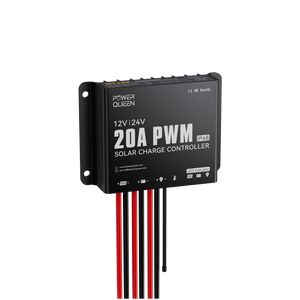
Step 5 Confirm Your Solar Charge Controller Supports Lithium Settings
Your solar controller must support lithium settings because lithium charging voltage differs from lead-acid. Many RV solar controllers are set to AGM or flooded battery mode by default, which can reduce charging efficiency.
Correct settings allow lithium to recharge faster and more completely.
Solar Controller Setup Checklist for Lithium
- Select lithium mode if available
- Set correct absorption voltage per the battery manual
- Disable equalization mode
- Adjust float settings according to manufacturer recommendations
Equalization mode is used for lead-acid batteries and can damage lithium batteries if enabled.
The National Renewable Energy Laboratory emphasizes that energy storage performance depends heavily on proper system integration and charge control.
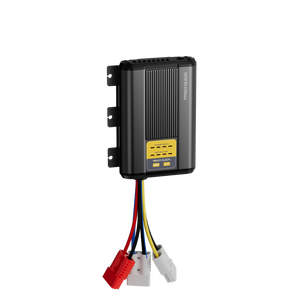
Step 6 Install a DC to DC Charger for Alternator Charging
A DC to DC charger is strongly recommended because lithium batteries can overload alternator charging systems. Lithium batteries accept high current quickly, which can cause alternators to run hot for extended periods.
A DC to DC charger regulates current and ensures safe charging while driving.
When a DC to DC Charger Is Essential
- You tow a travel trailer and charge through the 7-pin connector
- You drive long distances frequently
- Your lithium bank is 200Ah or larger
- You rely on alternator charging instead of shore power
This upgrade is one of the most important steps for RV owners who travel across multiple states and rely on charging while driving.
Step 7 Upgrade Wiring and Add Proper Fusing
Upgrading wiring and fusing is critical because lithium batteries can deliver higher current than lead-acid. Many older RV wiring setups were designed around the limited output of lead-acid batteries.
Proper protection prevents fire hazards and protects your investment.
Recommended Lithium Electrical Protection
- Main fuse within 7 inches of the battery positive terminal
- Properly rated circuit breaker for inverter loads
- Battery disconnect switch for storage and maintenance
- Correct cable gauge based on inverter wattage
The U.S. Department of Energy highlights the importance of safety controls and correct system design for lithium battery systems.
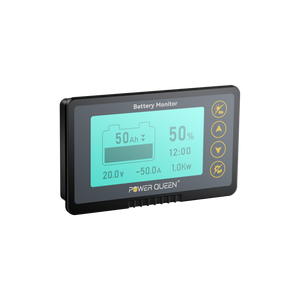
Step 8 Add a Battery Monitor for Accurate Battery Readings
A battery monitor is necessary because lithium voltage does not drop gradually like lead-acid. Lithium batteries maintain stable voltage for most of the discharge cycle, which makes voltage-based readings unreliable.
A shunt-based monitor provides accurate tracking of power usage.
What a Battery Monitor Helps You Track
- State of charge percentage
- Charging amps and discharging amps
- Solar input performance
- Inverter load demand
- Daily consumption trends
A monitor helps you avoid unexpected shutdowns when boondocking or running heavy loads.
Step 9 Test Your RV Lithium Battery System Before Your First Trip
Testing is essential because lithium systems rely on correct voltage settings and secure wiring. After installation, you should confirm that each charging source is working properly.
Lithium Conversion Testing Checklist
- Confirm converter voltage output
- Confirm solar controller charging voltage
- Confirm alternator charging is regulated
- Test inverter under load
- Check terminals and cables for heat buildup
If any connection becomes warm during heavy inverter use, shut down and correct the wiring immediately.
Real-World U.S. Examples of RV Lithium Battery Upgrades
Lithium conversion is most valuable in real American camping conditions where power reliability affects comfort. These examples show why lithium has become the standard for serious RV travel.
Example 1 Boondocking in Utah National Parks
Lithium batteries are ideal for camping in Zion, Bryce Canyon, and Canyonlands where generator use is often restricted. A lithium battery bank paired with solar panels allows faster recharge during limited daylight hours, reducing generator dependence.
Example 2 Full-Time RV Living in Florida
Lithium is a major upgrade for full-time RVers in Florida because daily cycling quickly destroys lead-acid batteries. Lithium systems handle daily charging and discharging with far less degradation, making them more cost-effective long term.
Example 3 Winter Camping in Colorado
Lithium performs extremely well in winter camping, but only if cold-weather charging is addressed. Many Colorado RV travelers choose heated lithium batteries because charging below freezing can permanently damage lithium cells.
For a real U.S. example of a lithium-powered RV setup, this Ruby M. & Matt D. Smith customer story shows how RVers built a powerful off-grid power station.

Cold-Weather Warning: Lithium Batteries Should Not Charge Below Freezing
Lithium batteries should not be charged below 32°F unless they include low-temperature protection or internal heating. Charging lithium below freezing can cause lithium plating inside the cells, which permanently reduces battery lifespan and capacity.
Unlike a lead-acid battery, lithium chemistry does not tolerate cold charging the same way. This is especially important for RV owners who store batteries in exterior compartments, because temperatures can drop below freezing overnight even when daytime weather feels mild.
If you camp in northern states or mountain regions, cold protection should be treated as a must-have feature, not an upgrade.
How to Protect an RV Lithium Battery in Winter
The best protection is to prevent charging until battery temperature rises above freezing. Many quality RV lithium battery models include a Battery Management System that blocks charging automatically in cold conditions.
Common cold-weather solutions include:
- Batteries with built-in low-temperature charging cutoff
- Heated lithium batteries with automatic warming
- Installing batteries inside the RV where cabin heat helps
- Insulating exterior battery compartments
- Adding temperature monitoring
MIT educational battery chemistry resources explain that lithium-ion chemistry is highly temperature sensitive, especially during charging.
💡 Read More: The Ultimate Guide to Lithium Batteries in Cold Weather.

Common Mistakes When Converting RV to Lithium Battery
Most lithium conversion problems happen because RV owners treat lithium as a drop-in replacement. Lithium works best when the charging system is upgraded along with the battery.
Common Lithium Conversion Mistakes
- Keeping an old lead-acid converter that cannot fully charge lithium
- Forgetting to disable solar equalization mode
- Charging directly from alternator without a DC to DC charger
- Skipping proper fuses and breakers
- Using undersized wiring for inverter systems
- Relying on voltage readings instead of a battery monitor
Avoiding these mistakes protects your battery investment and ensures reliable performance.
If your system does not charge correctly after installation, this guide on RV Battery Not Charging? Solutions to Solve! explains common causes and fixes.
How Much Does It Cost to Convert RV to Lithium Battery
The total conversion cost depends on how many components need replacement. Some RVs already have lithium-ready converters, while older RVs often require upgrades.
RV Lithium Conversion Cost Table
| Component | Typical U.S. Cost Range |
|---|---|
| 100Ah RV lithium battery | $300 to $900 |
| Lithium converter charger | $150 to $400 |
| Solar controller upgrade | $100 to $350 |
| DC to DC charger | $150 to $500 |
| Battery monitor | $120 to $300 |
| Wiring and fuses | $50 to $250 |
A basic lithium upgrade for weekend use may cost around $800 to $1,500. A full off-grid lithium solar system may cost $2,500 to $6,000 depending on battery capacity and inverter requirements.
RV Lithium Battery Maintenance Tips
Lithium maintenance is minimal because lithium batteries do not require watering or acid cleanup. Compared to lead-acid batteries, lithium ownership is simpler and cleaner.
To maximize battery lifespan, follow a few key habits.
Best Practices for Long Lithium Battery Life
- Store batteries at 40% to 60% charge during long storage
- Avoid leaving lithium at 100% for months
- Keep batteries warm enough for safe charging in winter
- Inspect cables and terminals periodically
FAQs About How to Convert RV to Lithium Battery
Can I replace a lead-acid battery with lithium without changing anything else
You can physically install lithium, but your converter and solar controller may not charge it correctly. Lithium batteries need a compatible charging profile for best performance.
Do RV lithium batteries work with solar panels
Yes, lithium works extremely well with solar, but your solar charge controller must support lithium charging settings.
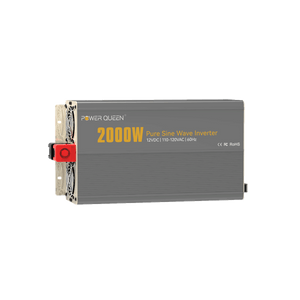
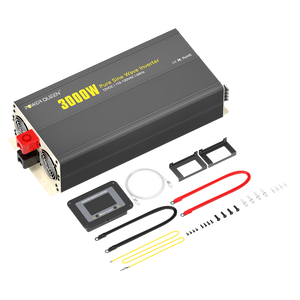
Do I need a new inverter for lithium batteries
Most inverters work fine, but you may need to adjust low-voltage cutoff settings. Lithium voltage stays stable longer than lead-acid, so some inverter settings may need tuning.
How long does an RV lithium battery last
A high-quality RV lithium battery can last 8 to 15 years depending on usage, charging habits, and temperature conditions.
For a detailed comparison, this guide explains How Long Do RV Batteries Last? Complete Guide for Lead-Acid & Lithium.
Is it safe to install lithium batteries inside an RV
Yes, lithium batteries are generally safe indoors because they do not vent gas during normal operation like flooded lead-acid batteries. Always choose a battery with a built-in BMS.
Can lithium batteries charge in freezing temperatures
Charging below 32°F can damage lithium batteries unless the battery has low-temperature cutoff protection or internal heating.
If you want a realistic estimate of off-grid runtime, this guide explains How Long Can an RV Battery Last While Boondocking?.
Final Thoughts on Converting RV Batteries to Lithium
Converting your RV to lithium is one of the best upgrades you can make because it increases usable power, improves charging speed, and reduces long-term replacement costs. If you upgrade your converter, solar controller, alternator charging method, wiring protection, and monitoring system, your RV lithium battery setup will perform reliably for years.
The best conversion is not the one with the biggest battery bank, but the one with the most compatible and properly configured charging system.
If you are building a high-demand RV electrical system, the Power Queen 12V 300Ah LiFePO₄ battery is a practical choice for powering larger inverters, 12V appliances, and extended off-grid stays.